How To Make Human Hair Lace Top Closure Pieces
Creating amazing hair at home is easy. Finishing it can be hard. Ready-made top closures can be found and bought, but such hair pieces are expensive and very difficult to work with, and may not match the color or hair texture pattern you like. Making your own hair top closure piece, means you’re guaranteed to get the ideal looking you dream.

Things You’ll Need
Fabric handkerchief
Wig cap
Bobby pins or hair combs
1,Braid your natural hair as close to the scalp as possible. Tuck any loose ends inside the braids, and cover with a protective kerchief or fabric cap.
2,Put on the wig cap, ensuring that the cap fit tightly to the head. Secure it with bobby pins or combs.
3,Sew the weave rounds to the wig cap in horizontal layers around the head, starting at the nape of the neck.
4,Continue the layering pattern around the sides of the head, working in a horseshoe shape to cover the temple area and forward scalp.
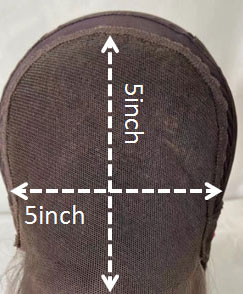
5,Stop at the crown of the head. There should only be a tight, dime-sized circle of uncovered lace left.
6,Cut off the end of the weave round at the weft -- the thread which binds the hair to the weave round. Measure two 2-inch pieces, cut, and fold them in half. Sew the folded pieces closed at the top of the weft.
7,Sew one folded piece to the open section at the crown of the head, by pushing the needle under and over the sewn fold, and through to the wig cap on the other side.
8,Use the second folded piece to seal off the top closure, and conceal the last of the stitches. Brush the hair over the crown -- and down the back and sides, creating an even part. No weave rounds or sewing stitches should be visible
Kind visit the link to find our check top closures selling online:
http://www.lacewigseller.com


